Socia; Registration
Social registration is a Splynx add-on that allows customers to register themselves in the Splynx portal using their e-mail address or cell phone number. Customers can also register and log in using their Google, Facebook or Twitter accounts.
If you want to use this add-on with social network platforms, it is necessary to have the API applications. If you don't have such apps, below you can find how to create them.
Google API
You need a Google API Console project to integrate Google Sign-In into your Splynx-site. To create a Google API Console project and client ID, follow these steps:
-
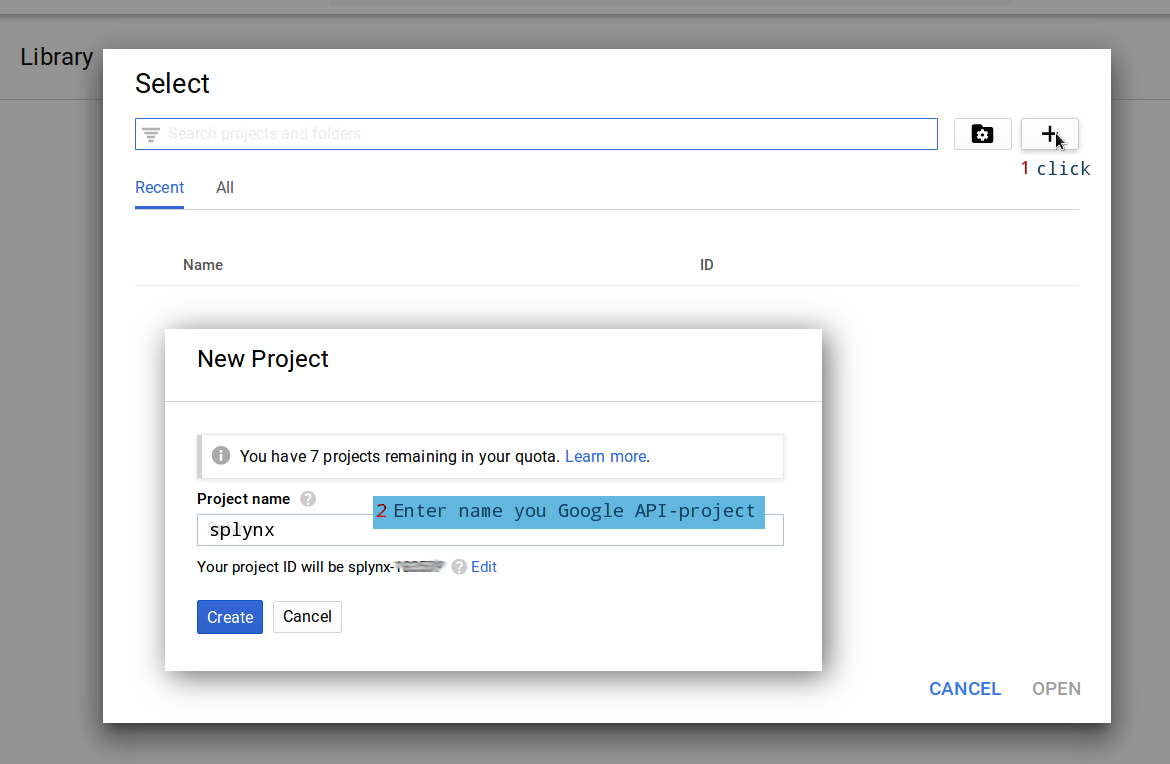
Go to the Google API Console (https://console.developers.google.com/projectselector/apis/library)
-
Select an existing project, or create a new one
-
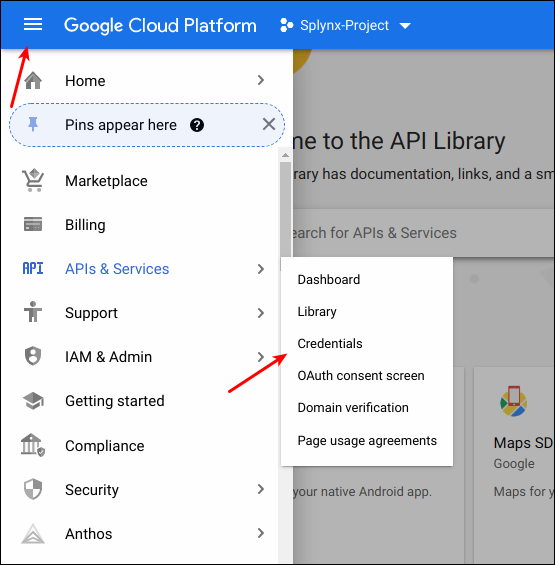
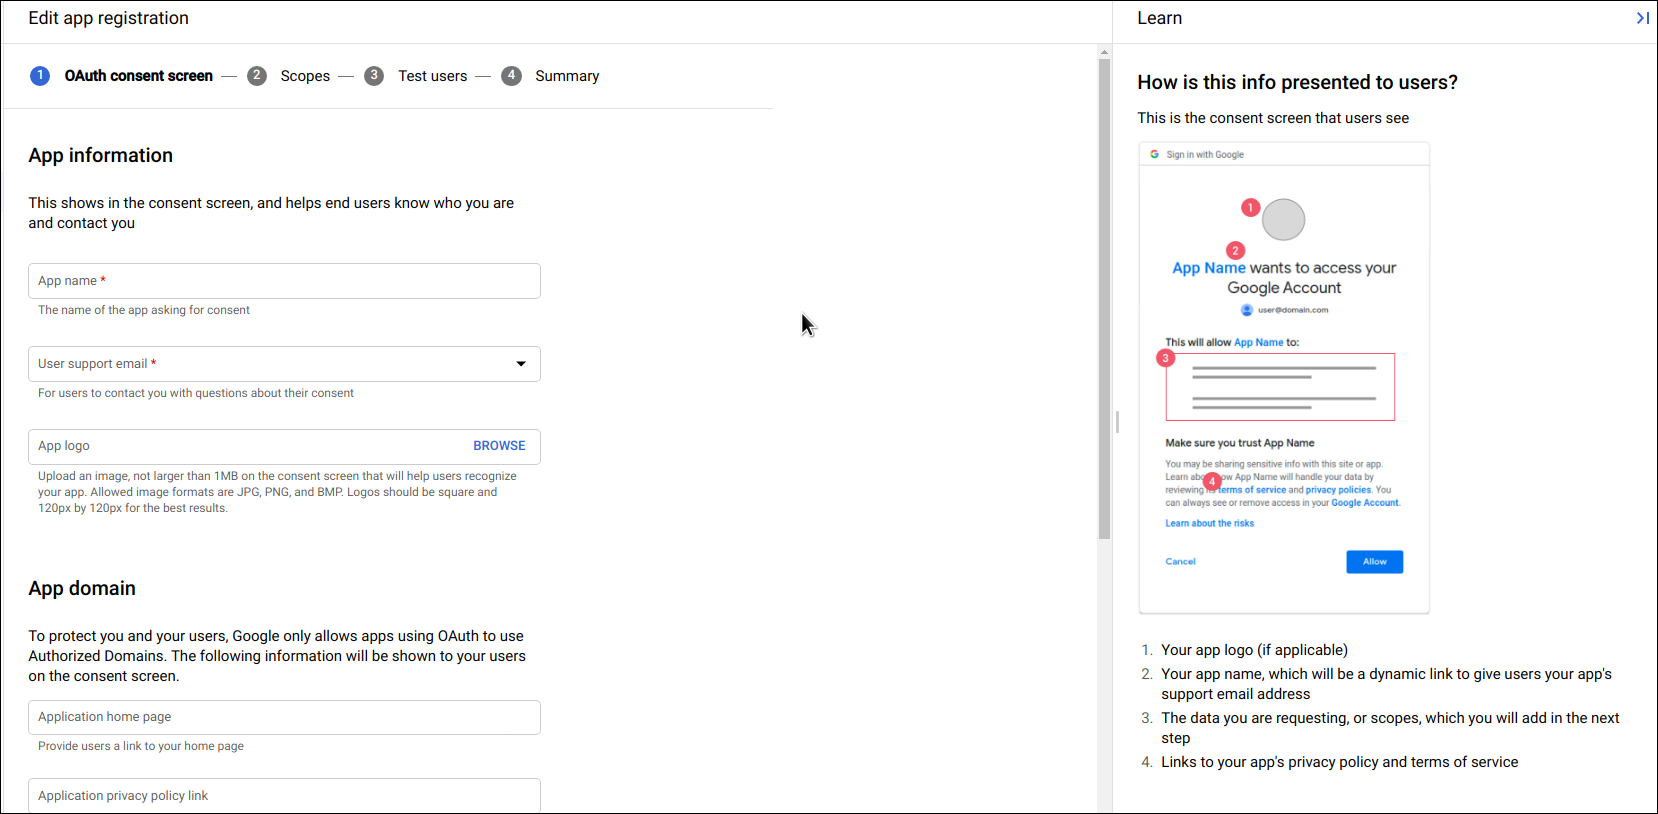
Click on the navigation menu, choose APIs & Services, select Credentials, then select the OAuth consent screen tab. In OAuth consent screen choose how you want to configure and register your app.
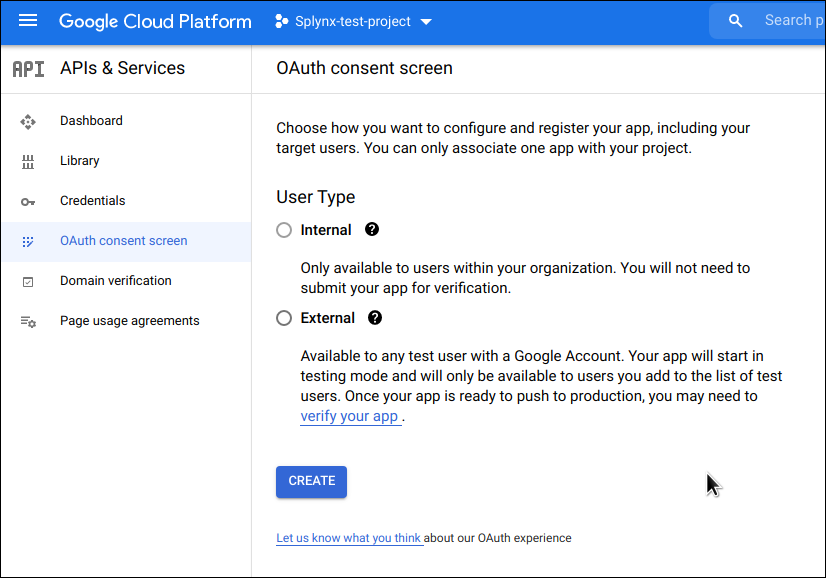


During app registration steps you should specify the app name, its logo, user support email, authorized domain, developer contact info, add the necessary scopes etc.
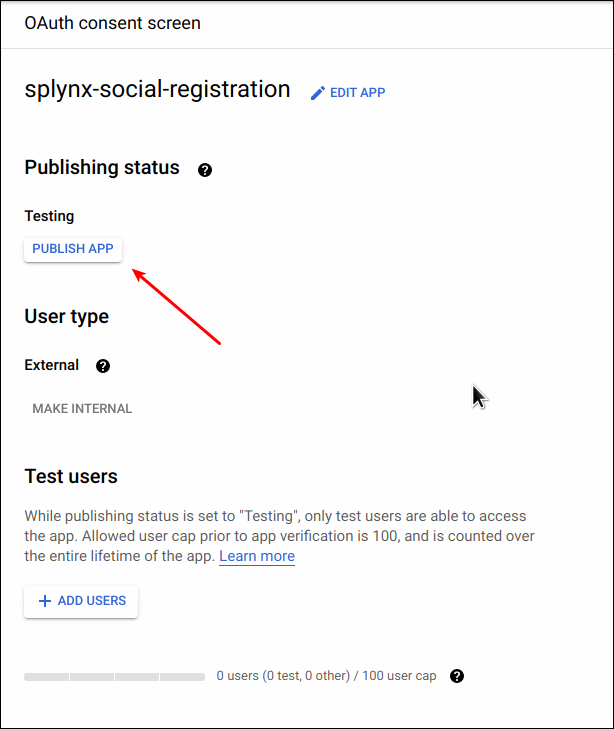
If you want to continue testing your app (internal app type), you can specify test users as well, only such users will be able to access the app. Otherwise, for production (external app type), publish your app. If you change your app's configuration in the future, like adding more than 10 domains, uploading a logo, or requesting sensitive or restricted scopes, you will need to submit for verification.
- In the Credentials tab, select Create credentials drop-down list, and choose OAuth client ID

-
Under Application type, select Web application; Authorized JavaScript origins - URL of your Splynx-server; Authorized redirect URIs - enter these values: 1)
https://splynx.youdomain.com/register/site/auth?authclient=google2)https://splynx.youdomain.com/register/login/auth?authclient=google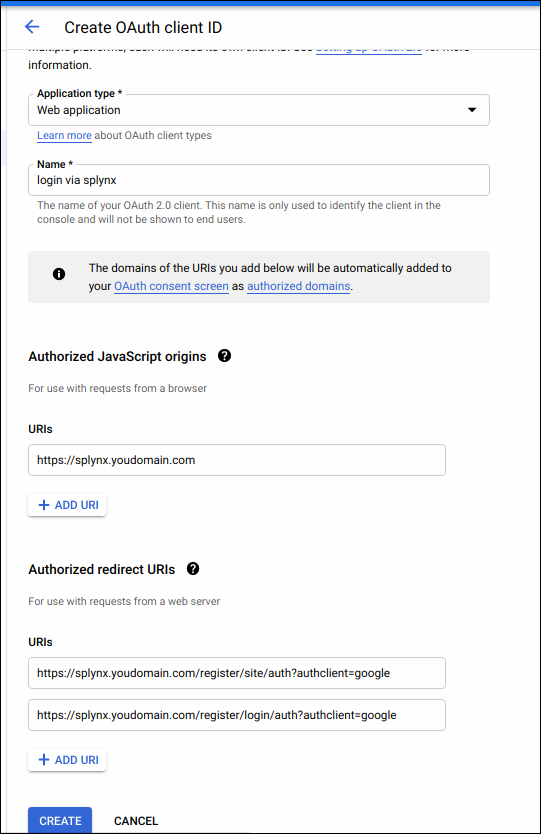
-
Click
Create

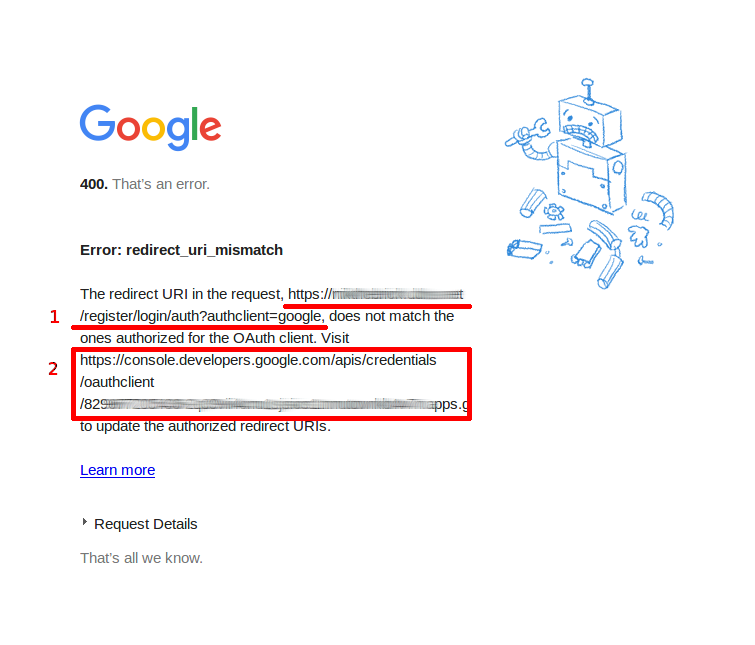
 If the customer receives this error message during registration or sign-in process, then the wrong URI has been added to Authorized redirect URIs list.
-
From the resulting OAuth client dialog box, copy Client ID and Client secret to Splynx (
Config → Integrations → Modules List → Splynx Social Registration Add-on)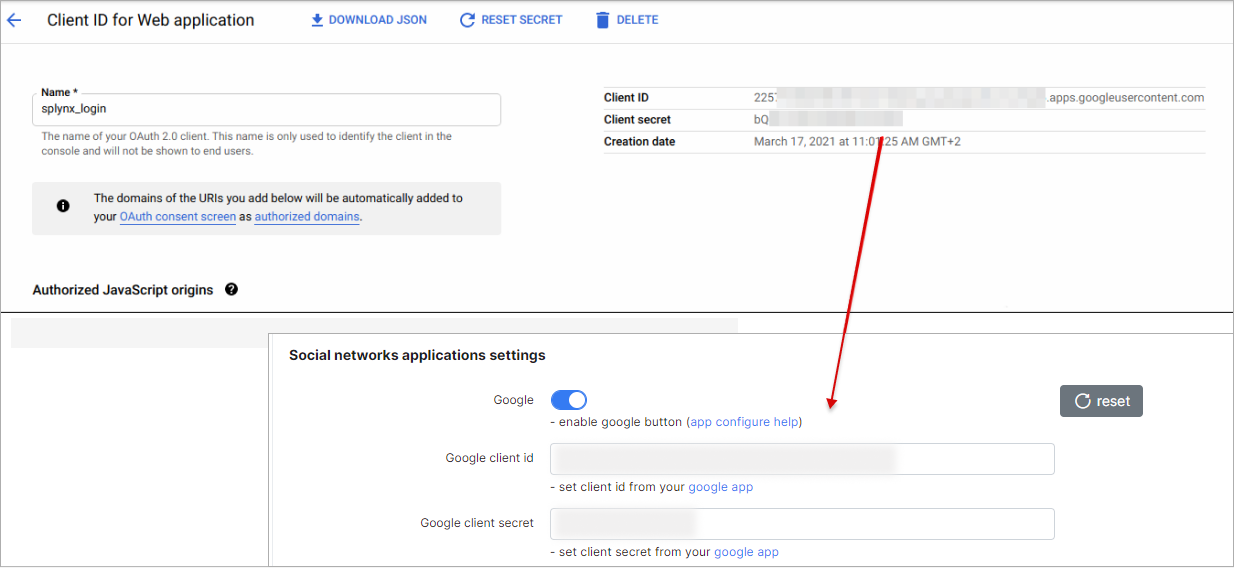
-
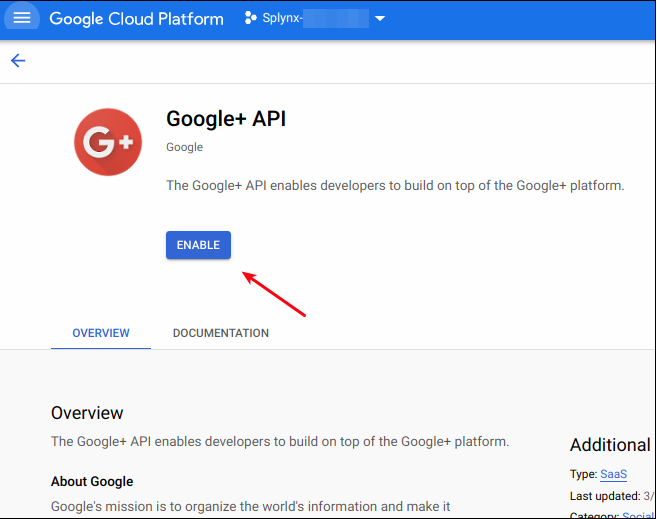
And, finally, turn on the Google+ API (https://console.developers.google.com/apis/library/plus.googleapis.com)


Reference: Google documentation
Facebook API
To integrate Facebook Logins into your Splynx-site, you must have a Facebook API.
 Splynx-site must use HTTPS. It is required by Facebook.
- Go to developers portal https://developers.facebook.com/apps
-
Create App and specify its name, app contact email, app purpose etc. Pay particular attention to complete the security check (Google reCaptcha), some adblock extensions can block it.
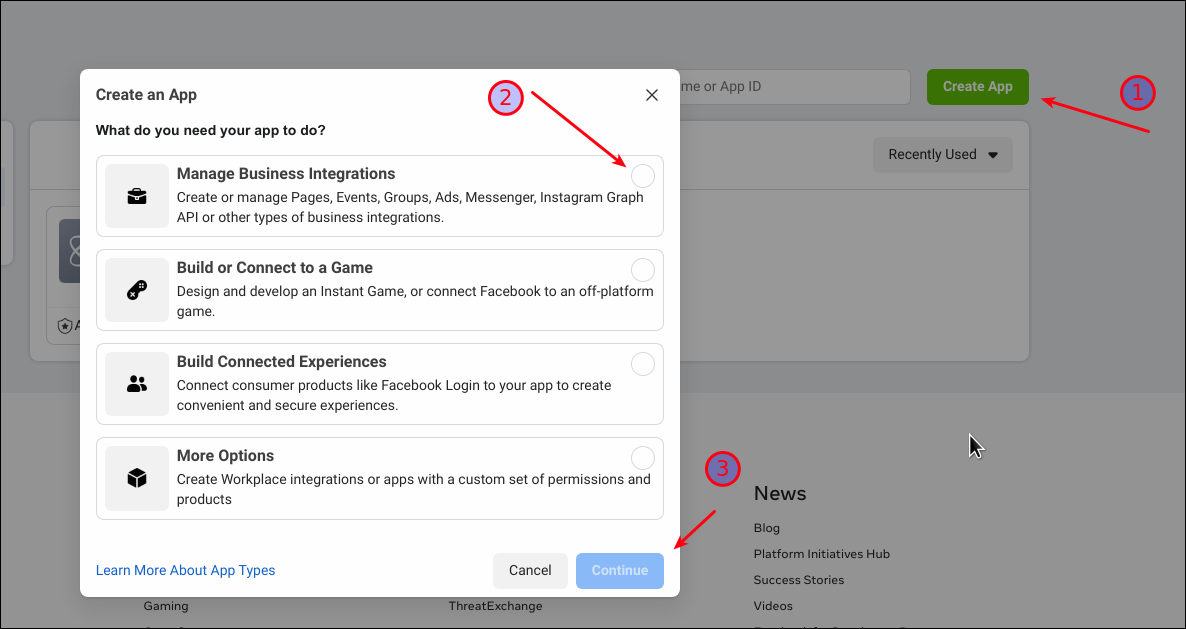
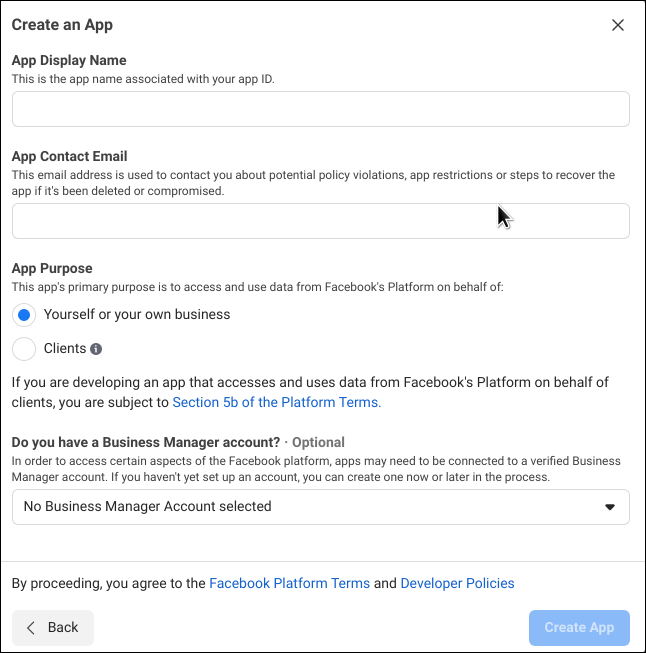


More about facebook app types.
-
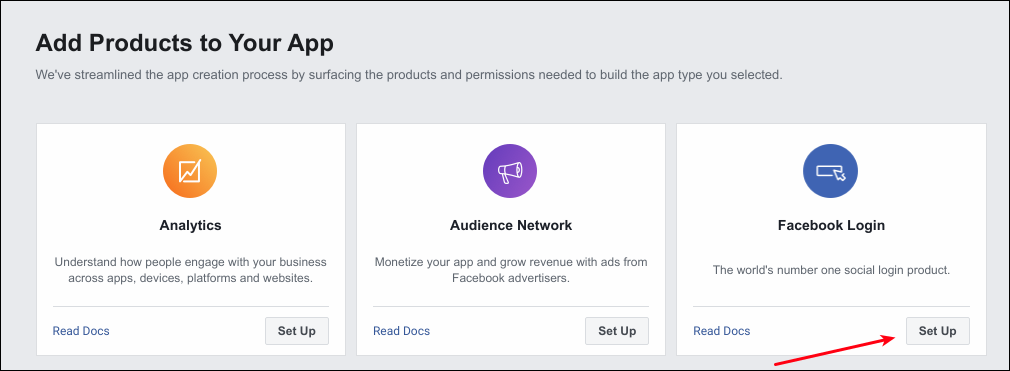
From Add Products to Your App select Facebook Login (click Set Up)
-
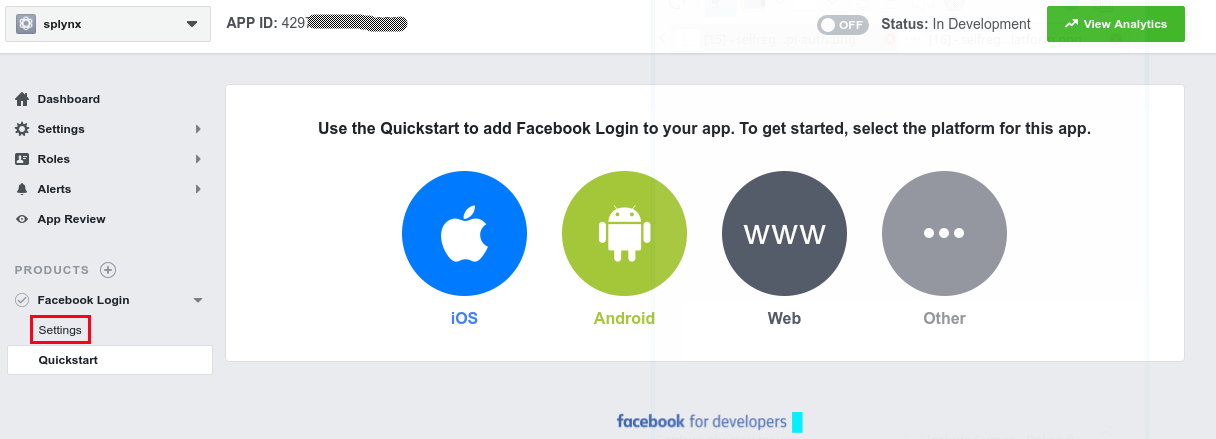
Do not use Quickstart, use Settings.


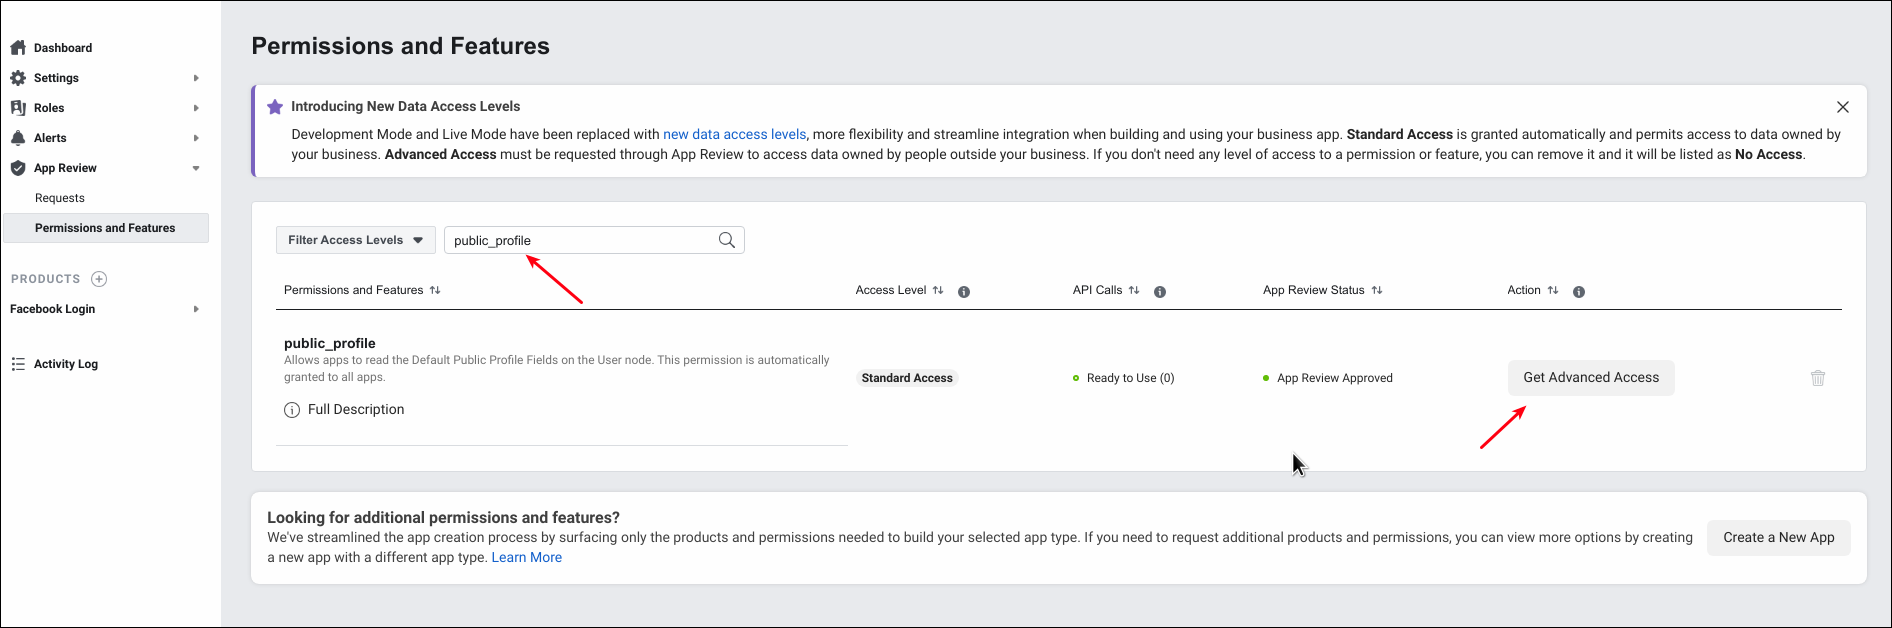
By default, the Facebook app has standard access to public_profile and email. It should be changed to advanced access.
The public_profile permission allows apps to read the Default Public Profile Fields on a User node. The allowed usage for this permission is to authenticate app users and provide them with a personalized in-app experience.
The email permission allows your app to read a person's primary email address. The allowed usage for this permission is to let end users log into your app with the email address associated with their Facebook profile.
In order to change permission settings, open App Review → Permissions and Features

-
Open facebook login settings and enter Valid Oauth redirect URIs: 1)
https://splynx.youdomain.com/register/site/auth?authclient=facebook2)https://splynx.youdomain.com/register/login/auth?authclient=facebook
-
Click
Save Changes -
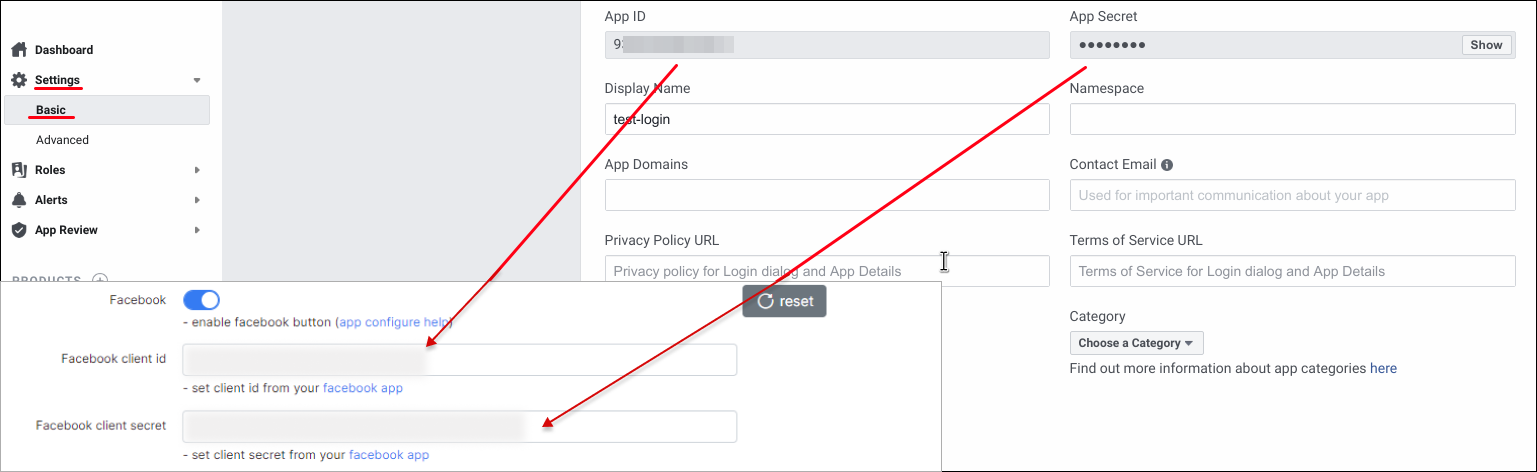
Go to App Settings / Basic, copy App ID and App Secret to Splynx (Config → Integrations → Modules List → Splynx Social Registration Add-on)


Reference: Facebook documentation
Twitter API
For Twitter integration, go to the Application Management page - https://apps.twitter.com/
-
Create a New App

-
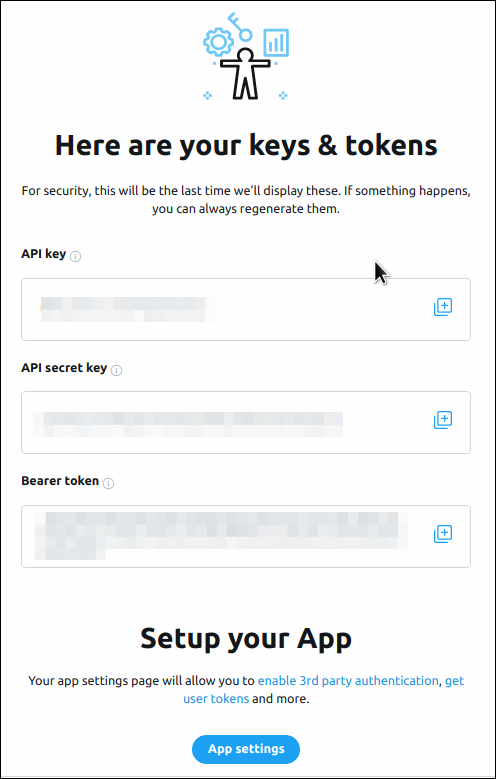
Enter application Name and copy your API key (consumer key) and API secret key (consumer secret) to Splynx (Config → Integrations → Modules list → Splynx Social Registration Add-on). After that click on App settings button.

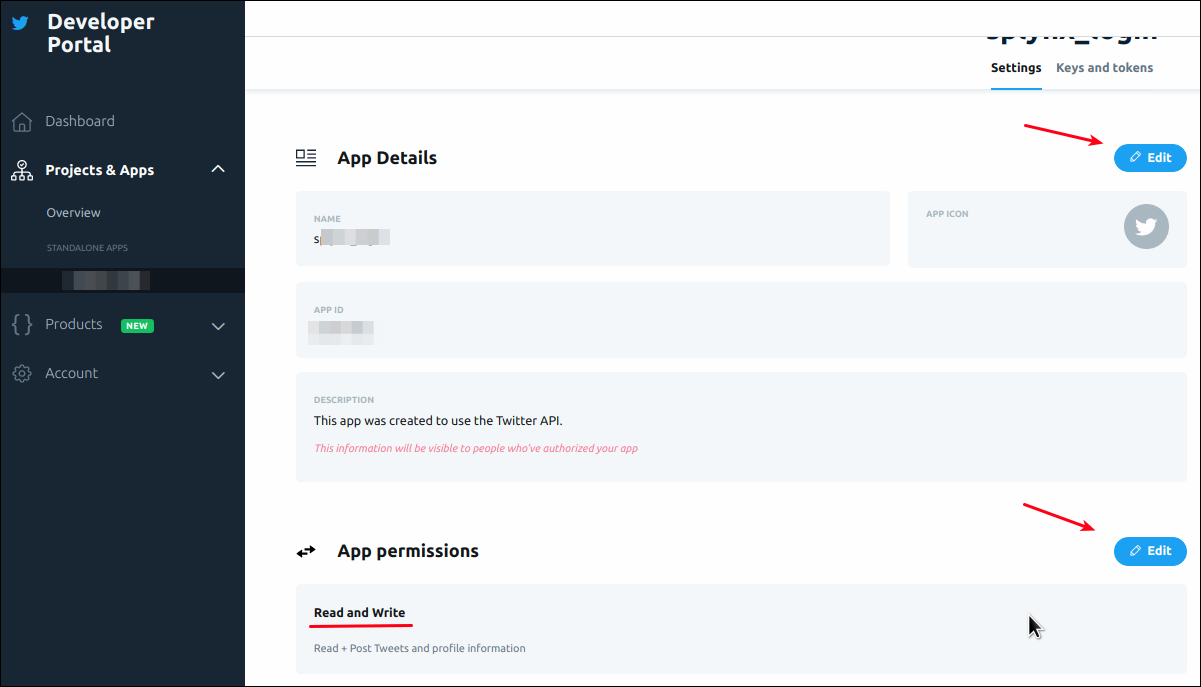
- In App settings you can specify app description and its icon. Also, it's necessary to change App permissions to Read and Write.
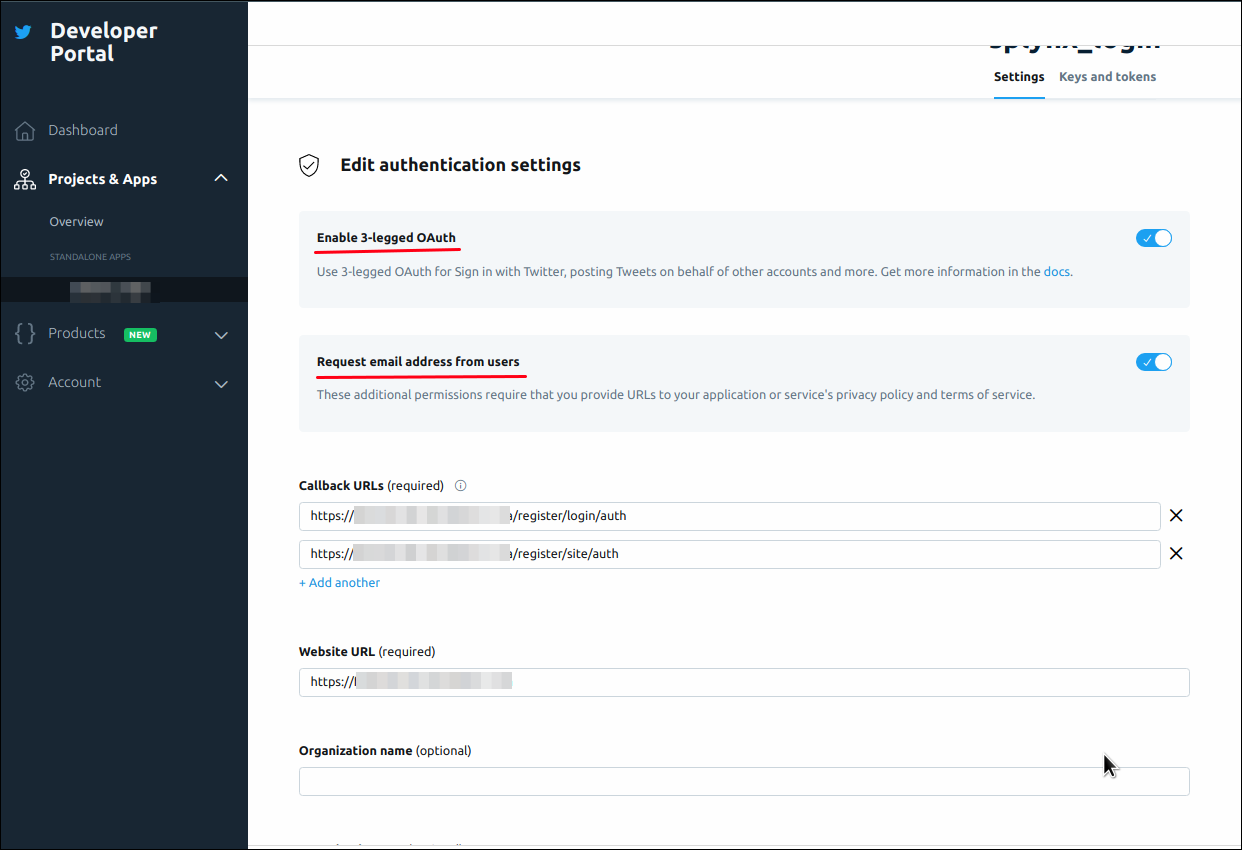
- In Authentication settings enable 3-legged OAuth and Request email address from users options, after that add info to required fields:
Callback URLs:
1)
https://splynx.youdomain.com/register/login/auth2)https://splynx.youdomain.com/register/site/auth;
Website URL: https://splynx.youdomain.com ;
Terms of service and Privacy policy:https://splynx.youdomain.com/privacy_policy.
Installation
The add-on can be installed in two methods: via CLI or the Web UI.
To install the "Social Registration" add-on via CLI, the following commands can be used:
sudo apt update
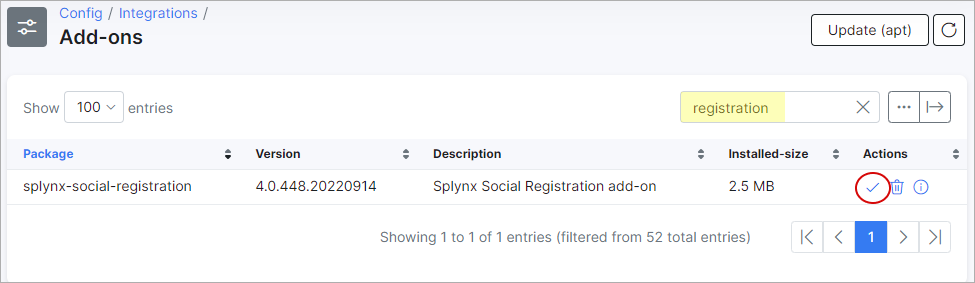
sudo apt install splynx-social-registrationTo install it via the Web UI, navigate to Config → Integrations → Add-ons:

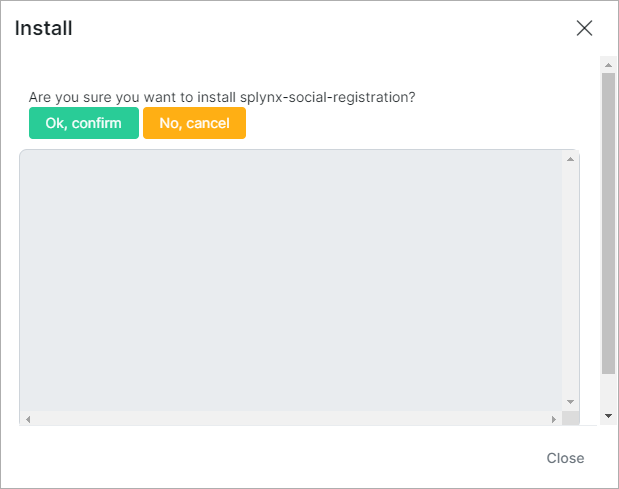
Locate or search for the "splynx-social-registration" add-on and click the Install icon in the Actions column:
Click the OK, confirm button to begin the installation process:
Configuration
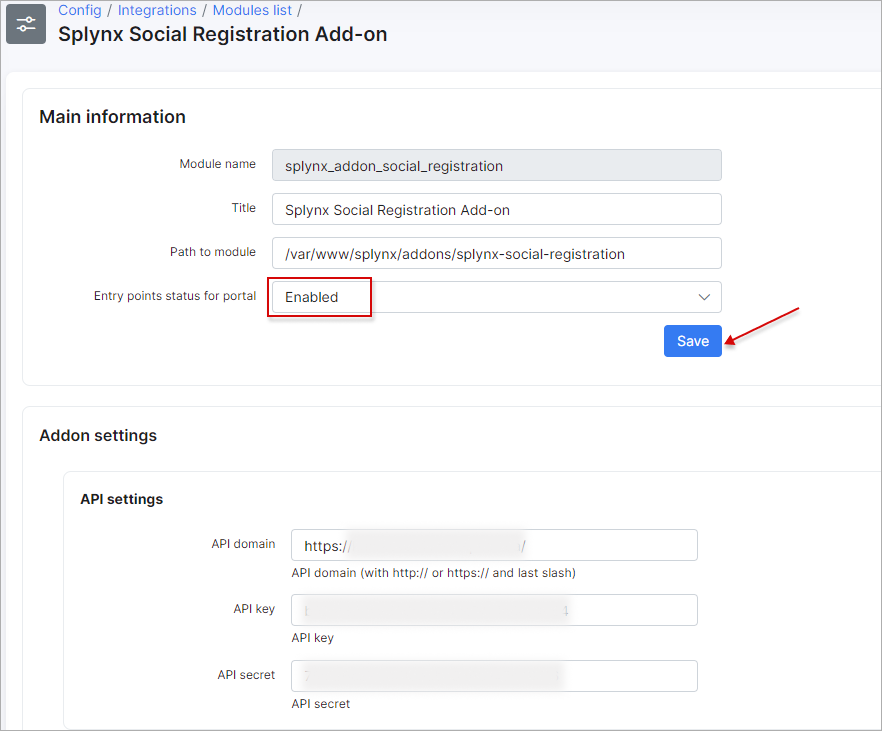
After the installation has completed, you have to configure the add-on under Config → Integrations → Modules List.

Locate or search for the "splynx-social-registration" add-on and click the Edit icon in the Actions column:

You need to enable the Entry points status for portal in the Main information section:
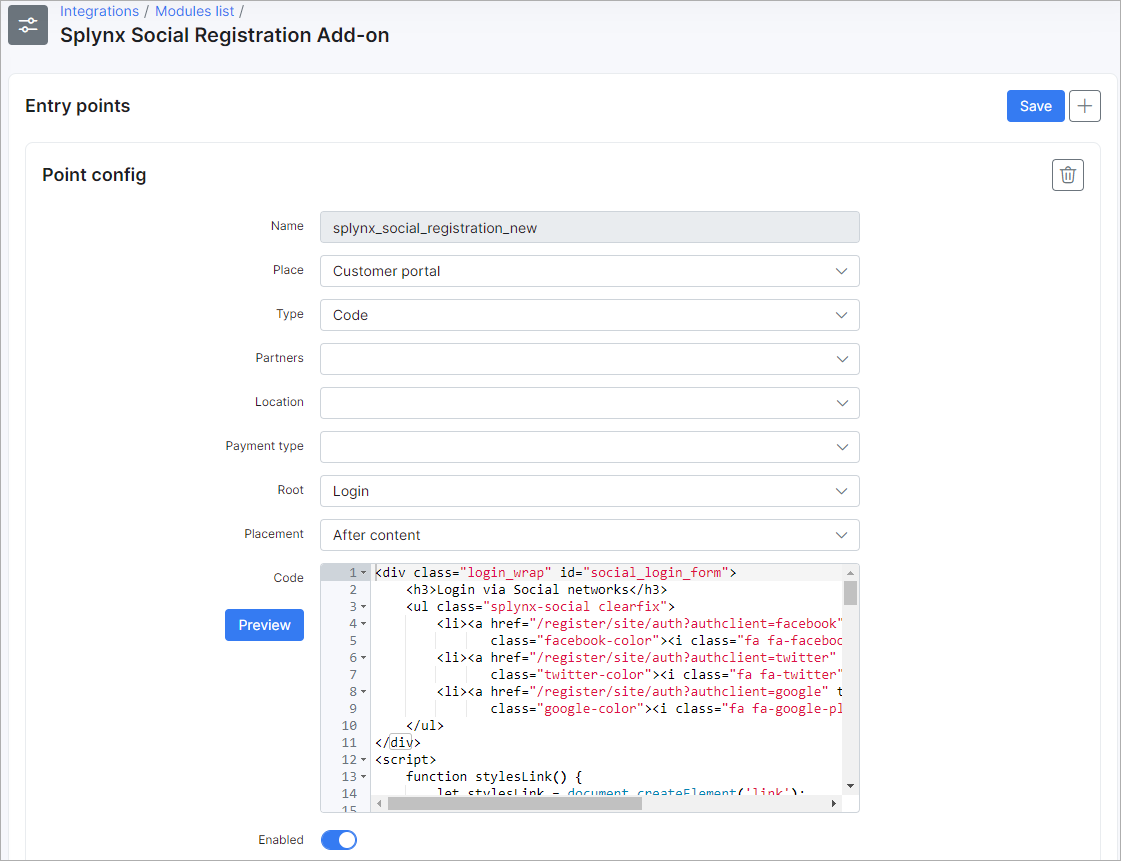
You may enable or disable Entry Points here as well. There are two entry points in the configuration.

The first one provides the ability to sign-in to the Splynx-portal using social networks:
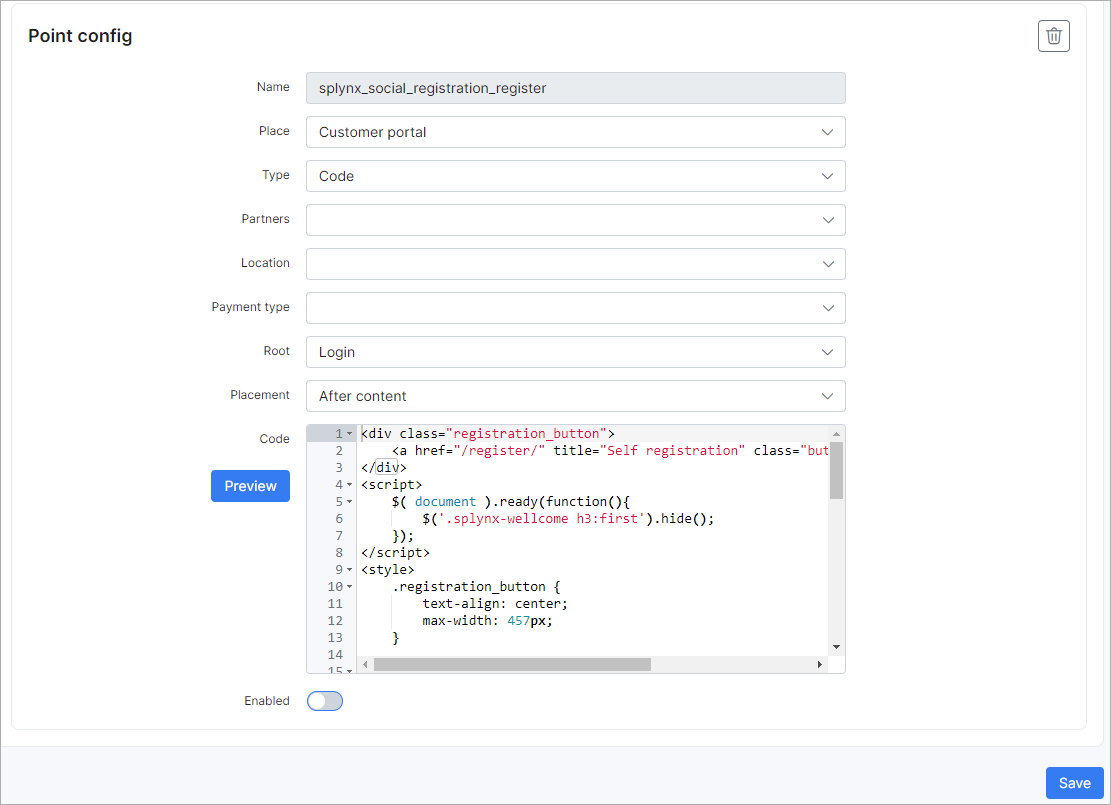
The second one provides the ability of registration via social networks:
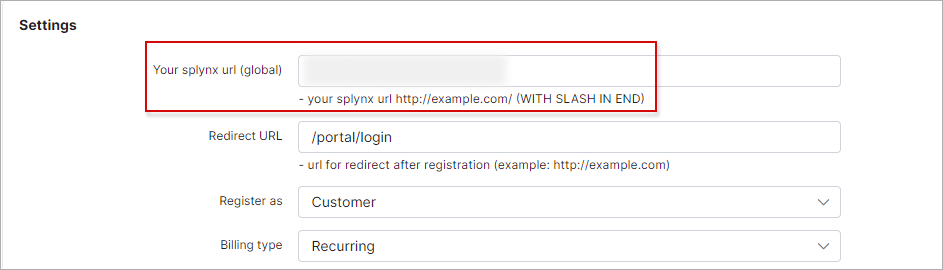
Edit the URL of your server:
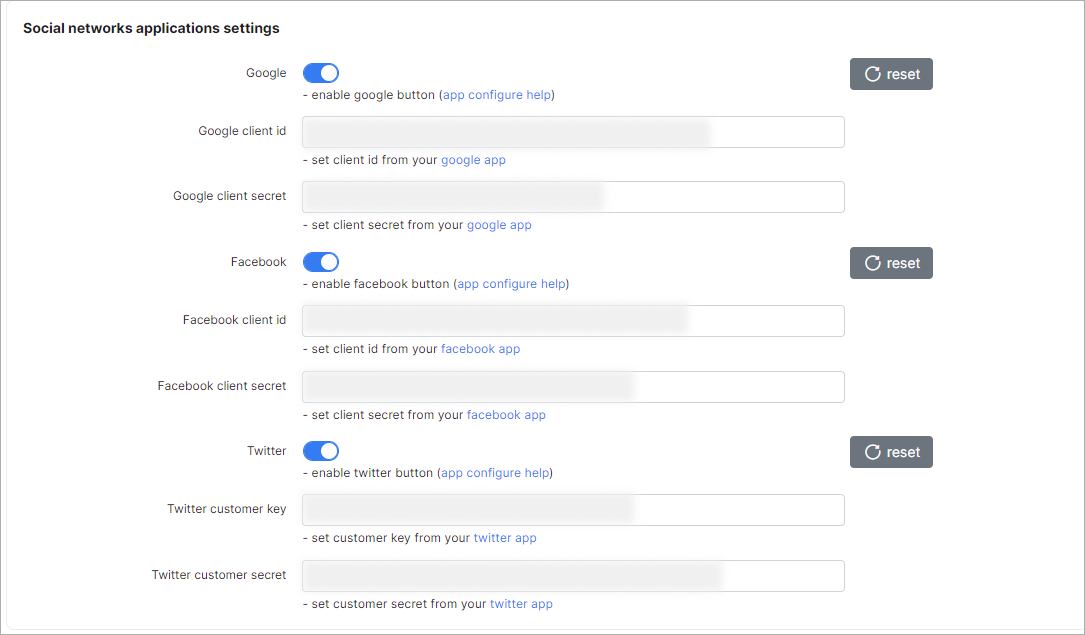
Enable social networks that you want to use:
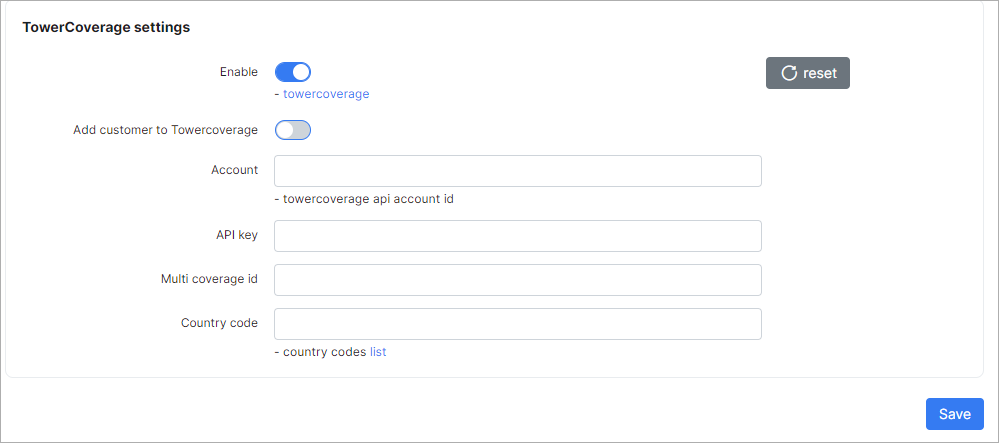
Also, you can enable TowerCoverage integration (optional):
Once all settings have been configured click on Save.
Registration
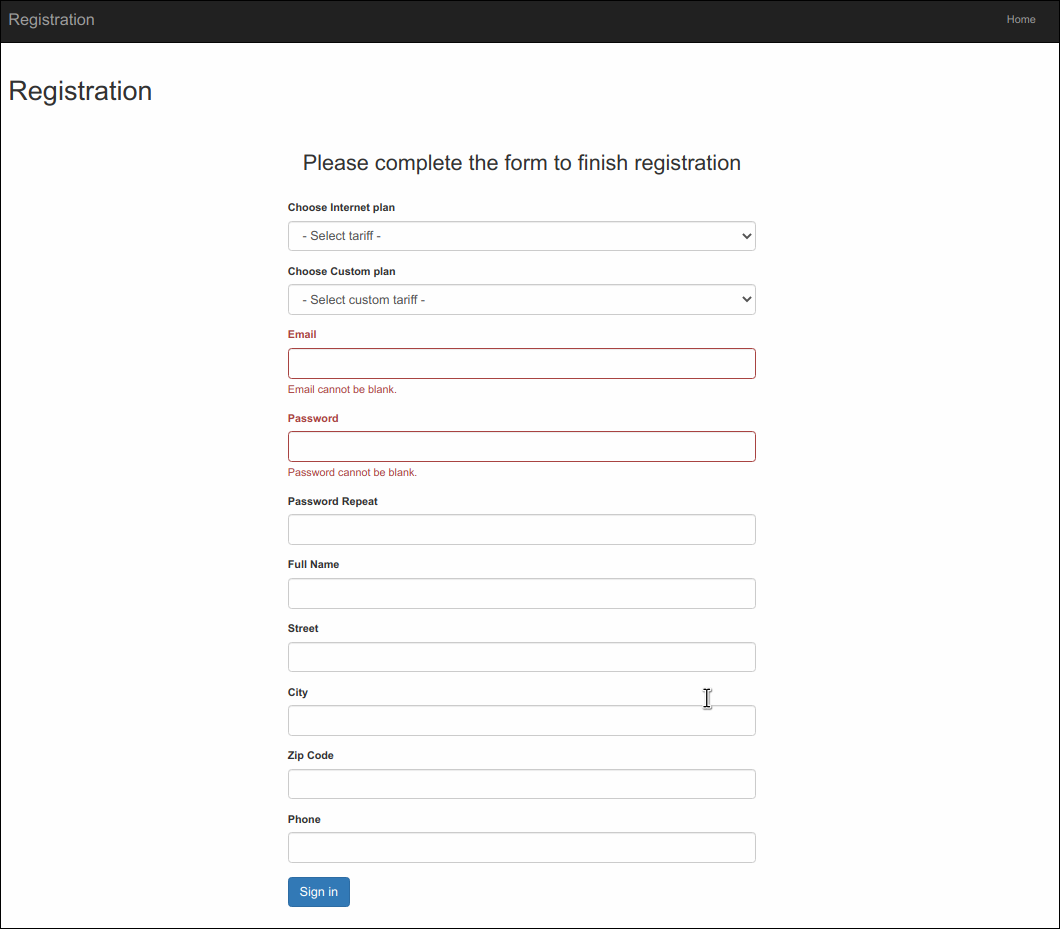
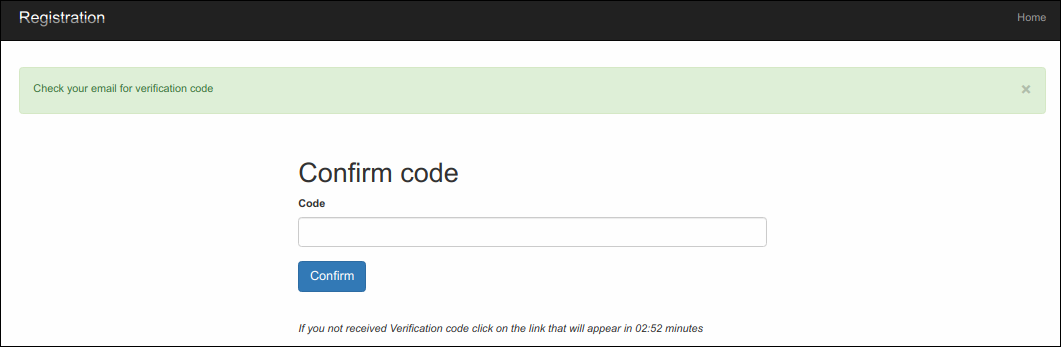
Customer will need to Enter the required information, and click on the Sign In button. Confirmation code will be send to the mentioned mail box.
Login customer to Splynx-portal
-
Login with Facebook
If the customer is not logged into Facebook, they will be prompted to log into Facebook and then redirected to Splynx-portal.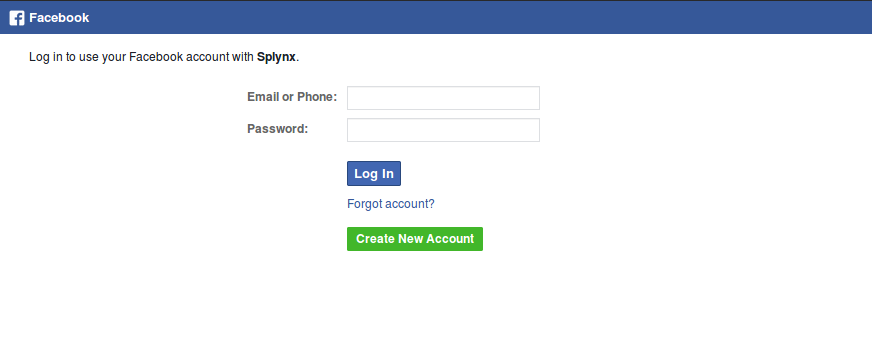
-
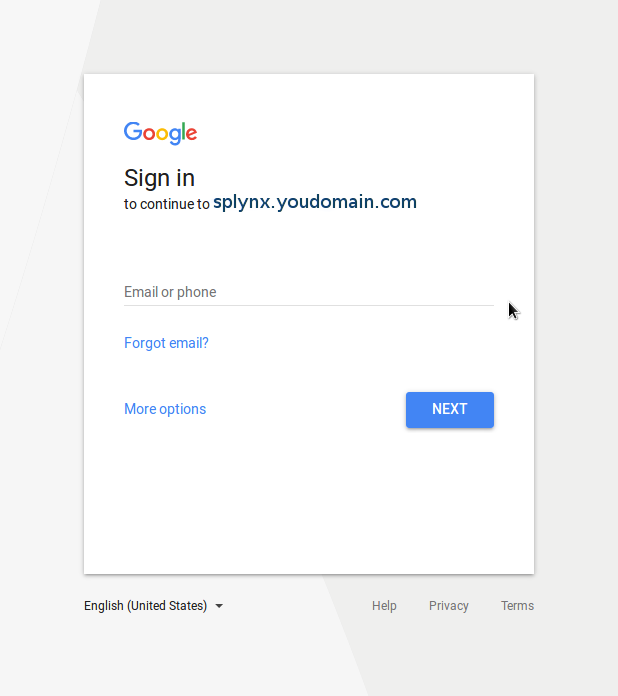
Login with Google If the customer is not logged in Google, they will be prompted to log into Google and then redirected to Splynx-portal.
-
Login with Twitter
If the customer is not logged in Twitter, they will be prompted to log into Twitter and then redirected to Splynx-portal.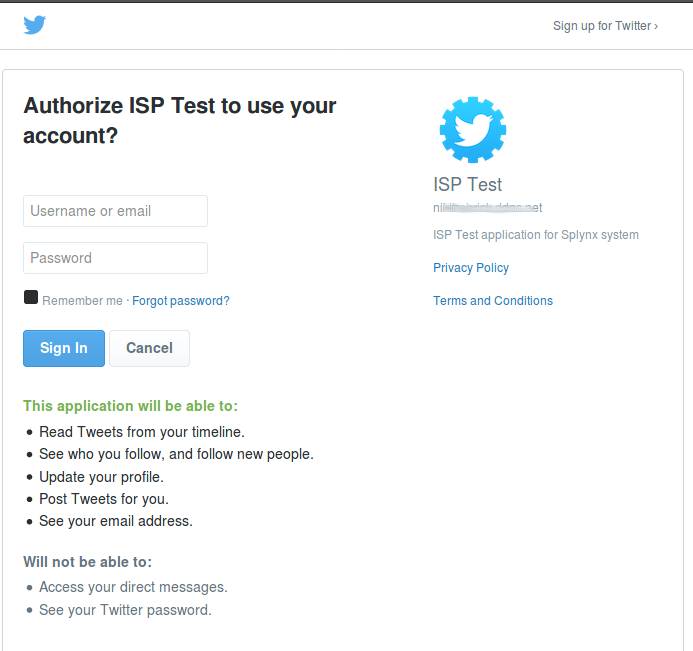


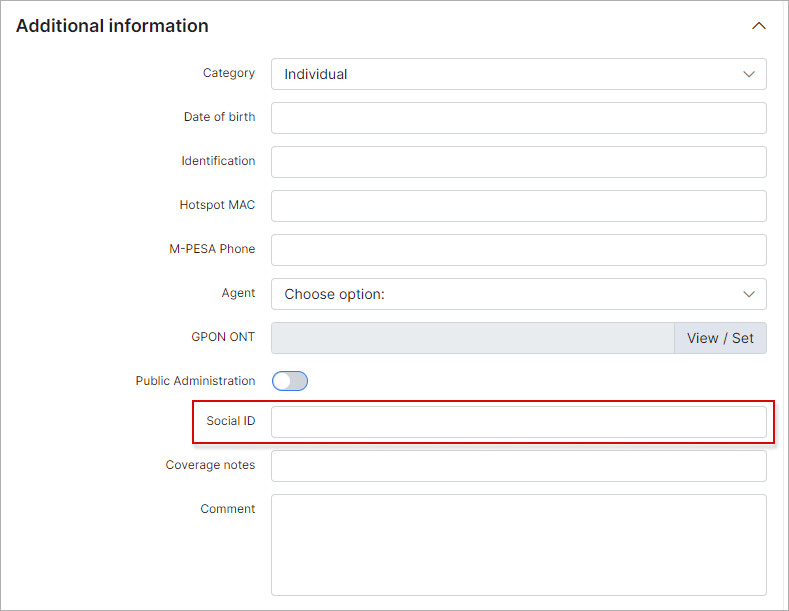
Information about the social network is stored in Customer → Information → Additional information in the Social ID field.